Proper laptop cleaning is one of the most overlooked yet critical aspects of computer ownership. It goes far beyond simple aesthetics; it’s a fundamental practice of preventative maintenance that directly impacts your device’s performance, longevity, and overall health.
Many users see a dusty screen or crumb-filled keyboard as a minor annoyance, but these are often symptoms of a deeper issue. Neglecting regular computer cleaning can lead to dust and debris accumulation within the chassis, clogging cooling fans and insulating critical components.
This buildup traps heat, forcing your system to work harder. The result can be thermal throttling (a deliberate slowing of the processor to prevent overheating), unexpected shutdowns, and, in the worst-case scenario, permanent hardware failure.
This guide will walk you through every facet of laptop cleaning, from a simple screen wipe-down to the more intricate process of internal dusting. We’ll explore the tools you need, the techniques to use, and when it’s time to call in professionals for a full computer servicing, ensuring your machine runs as coolly and efficiently as the day you bought it.
The Critical Importance of Regular Laptop Cleaning
Why is a consistent laptop cleaning schedule so vital? Think of your laptop as a high-performance vehicle. You wouldn’t drive a car for years without changing the oil or cleaning the air filters. Similarly, your laptop requires regular maintenance to perform optimally. Dust, pet hair, skin cells, and other airborne particles are constantly being pulled into your machine by its cooling fans.
Over time, this debris forms a thick blanket over the heatsink and internal components. The fan, now struggling to push air through a clogged system, has to spin faster and louder, consuming more battery power and still failing to adequately cool the CPU and GPU. This is the primary cause of performance degradation in older laptops. A thorough computer cleaning can often restore a sluggish machine to its former glory, proving that the issue wasn’t obsolete hardware but simply poor thermal management. By investing a small amount of time in laptop cleaning, you can prevent costly visits for computer service and repair and significantly extend the usable life of your device.
The Dangers of a Dirty Computer
- Overheating: The number one enemy of electronic components. Excess heat accelerates wear and tear and can lead to irreversible damage.
- Performance Throttling: Modern CPUs automatically reduce their speed to prevent heat damage. Regular laptop cleaning ensures your processor can run at its full potential.
- Component Failure: Sustained high temperatures can cause solder points to fail, capacitors to burst, and chips to degrade, leading to system instability and crashes.
- Hygiene Concerns: Your keyboard can harbor more bacteria than a toilet seat. Regular cleaning is essential for your personal health.
- Reduced Lifespan: A clean, cool-running laptop will last significantly longer than a hot, dusty one.
Your Essential Laptop Cleaning Arsenal: Tools of the Trade
Before you begin any laptop cleaning task, gathering the right tools is paramount. Using improper materials, like paper towels or harsh household cleaners, can cause permanent damage, such as scratches on the screen or discoloration of the chassis. Investing in a proper kit is a small price to pay for your laptop’s safety.
Your Core Cleaning Kit Should Include:
- Compressed Air (or an Electric Duster): Essential for blowing dust out of keyboards, ports, and internal cooling vents without direct contact. An electric duster is a more environmentally friendly and cost-effective long-term investment.
- Microfiber Cloths: You’ll need at least two—one for the screen and one for the body. Their soft, non-abrasive texture traps dust and absorbs oils without scratching surfaces.
- Isopropyl Alcohol (IPA) 70% or higher: Perfect for disinfecting the keyboard and chassis. It evaporates quickly and is safe for most electronics’ exteriors. Never use it on the screen.
- Soft-Bristled Brushes: A set of small, soft brushes (like makeup brushes or paintbrushes) is invaluable for dislodging stubborn dust from between keys and in vents where compressed air can’t reach.
- Cotton Swabs: Useful for cleaning tight spots, like the edges of keys or inside ports (use with care).
- Dedicated Laptop Screen Cleaner Solution: A specially formulated solution designed to safely clean delicate LCD and OLED displays.
H3: Choosing the Right Laptop Screen Cleaner
When you need to clean laptop monitor screens, not just any liquid will do. The screens are coated with sensitive anti-glare and oleophobic layers that can be stripped away by common chemicals. This is why a dedicated laptop screen cleaner is a non-negotiable part of your kit.
What to Look For in a Laptop Screen Cleaner:
- Ammonia-Free and Alcohol-Free: These chemicals are too harsh and will damage the screen’s coating over time.
- Distilled Water Base: The primary ingredient should be purified water to avoid leaving mineral deposits.
- Anti-Static Properties: A good cleaner will help repel dust after cleaning.
- Comes with a Quality Microfiber Cloth: Reputable brands often bundle their solution with an appropriate cloth.
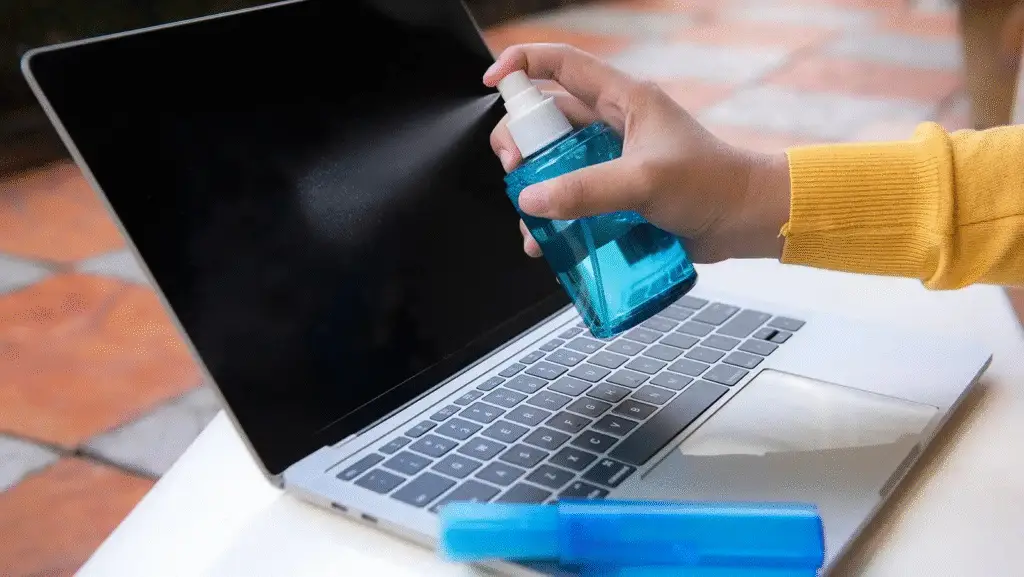
Pro-Tip: Never spray the laptop screen cleaner directly onto the screen. Always apply a small amount to your microfiber cloth first, then gently wipe the monitor.
Step-by-Step Guide to External Laptop Cleaning
This is the routine computer cleaning you should perform every one to two weeks to keep your device in top shape. Always power down your laptop, unplug it from the power adapter, and remove the battery if it’s removable before you begin.
Step 1: The Keyboard and Touchpad
Your keyboard is often the dirtiest part of your laptop. A thorough laptop cleaning of this area is crucial for both hygiene and functionality.
- Dislodge Debris: Hold your laptop open but upside down (or at a 75-degree angle) and gently shake it to allow loose crumbs and dust to fall out.
- Use Compressed Air: In short, controlled bursts, use compressed air to blow out any remaining debris from between the keys. Work in a systematic grid pattern across the keyboard. Be careful not to hold the can upside down, as this can spray propellant liquid.
- Brush It Out: Use your soft-bristled brush to gently sweep out any stubborn particles that the air didn’t get.
- Wipe and Disinfect: Lightly dampen a microfiber cloth with 70% isopropyl alcohol. Ensure the cloth is damp, not wet. Wipe down the surface of each key and the touchpad to remove oils and disinfect the surface. This step is a key part of the “cleaning comp” process, ensuring a sanitary user interface.
Step 2: How to Safely Clean Laptop Monitor Screens
A clean, smudge-free screen makes a world of difference. The process to clean laptop monitor surfaces is delicate but straightforward.
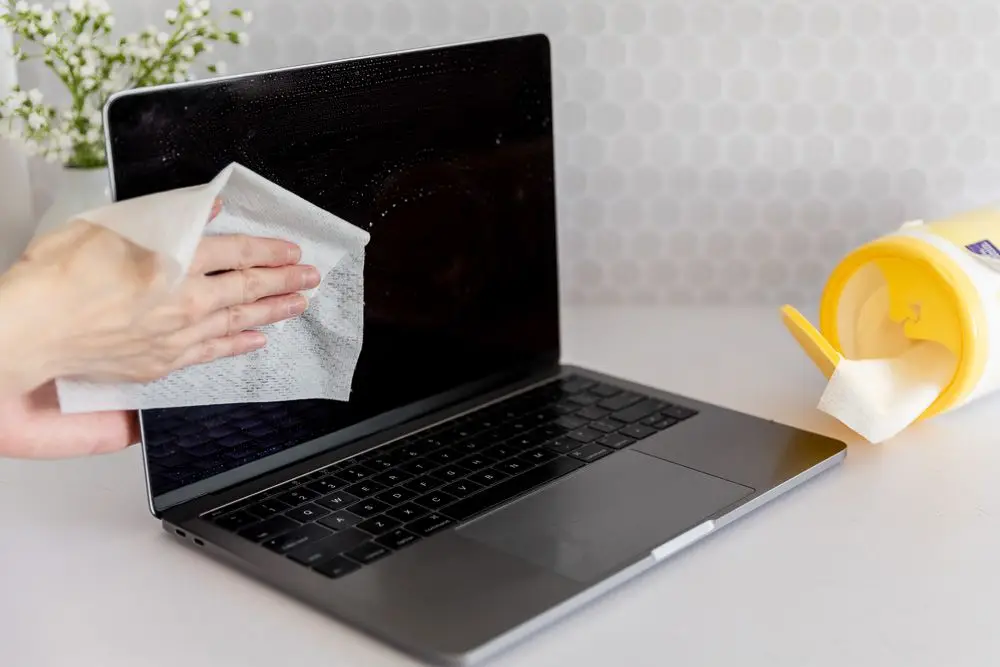
- Dry Wipe First: Use a clean, dry microfiber cloth to gently wipe the screen in one direction (e.g., top to bottom) to remove loose dust. Wiping in circles can sometimes just smear the grime around.
- Apply the Cleaner: Lightly spray your dedicated laptop screen cleaner onto a different, clean section of your microfiber cloth. Again, never spray directly onto the monitor itself, as liquid could drip down into the bezel and damage internal components.
- Gentle Wiping Motion: With the dampened cloth, wipe the screen from top to bottom with gentle, even pressure. Don’t press hard, as this can damage the pixels.
- Buff Dry: Use a dry portion of the cloth to lightly buff the screen and remove any streaks. This final touch is key to a perfect laptop cleaning finish.
Step 3: Cleaning the Chassis, Vents, and Ports
The body of your laptop and its ventilation system are magnets for dust. This part of the computer cleaning process is vital for maintaining proper airflow.
- Wipe the Body: Use the same cloth you used for the keyboard (the one with isopropyl alcohol) to wipe down the entire exterior chassis—the lid, bottom, and palm rests. This removes fingerprints and grime.
- Clear the Vents: Locate the air intake and exhaust vents (usually on the sides, back, or bottom). Use compressed air to blow dust out of the vents. Use short bursts and aim the air away from the inside of the laptop as much as possible to prevent pushing dust deeper.
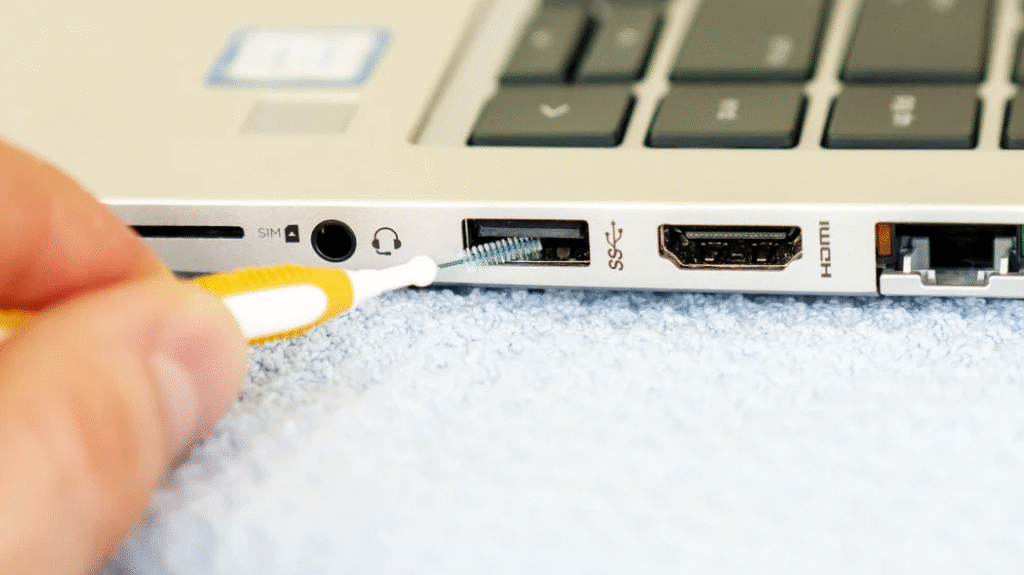
- Clean the Ports: Carefully use a puff of compressed air to clear out dust from USB, HDMI, and other ports. For stubborn grime inside a port, a dry cotton swab or a wooden toothpick can be used very gently.
Diving Deeper: A Guide to Internal Computer Cleaning
Disclaimer: Opening your laptop can be risky. It may void your warranty and, if done improperly, can lead to permanent damage. This level of laptop cleaning is for confident users. If you have any doubts, it is always safer to seek professional computer servicing. This section is a general guide; the exact process will vary significantly between laptop models. Always search for a specific teardown guide for your model on sites like iFixit before you begin.
Internal computer cleaning is the most effective way to combat overheating. It involves removing the bottom panel of your laptop to directly access and clean the cooling fans and heatsink.
H3: Preparing for Internal Laptop Cleaning
- Power Down and Unplug: Ensure the laptop is completely off and disconnected from all power sources.
- Ground Yourself: Static electricity can kill computer components. Work on a non-conductive surface and touch a large metal object (like a desk leg) before you start to discharge any static buildup. An anti-static wrist strap is highly recommended.
- Get the Right Tools: You will need a set of small Phillips-head and possibly Torx screwdrivers. Keep a small tray to organize the screws you remove.
Cleaning the Fans and Heatsink
This is the primary objective of your internal laptop cleaning effort.
- Open the Case: Carefully unscrew and remove the bottom panel of your laptop.
- Locate the Cooling System: You will see one or more fans connected by copper heat pipes to a finned metal block (the heatsink) sitting over the CPU/GPU.
- Immobilize the Fan: Before using compressed air, it is crucial to prevent the fan from spinning freely. A blast of compressed air can spin the fan blades far beyond their rated speed, which can damage the fan motor. Use a finger or a plastic tool to gently hold the fan blades in place.
- Blast the Dust: Use short bursts of compressed air to blow the dust out of the fan housing and, most importantly, through the heatsink fins. You will likely see a large cloud of dust emerge from the exterior vent. This is the thermal-insulating blanket you are removing.
- Brush Away Residue: Use your soft brush to gently remove any caked-on dust that the air didn’t dislodge.
The Specialized Role of a PC Board Cleaner
In most routine laptop cleaning scenarios, you will not need to clean the main motherboard (the PC board). However, in specific situations, such as after an accidental liquid spill, a specialized pc board cleaner becomes necessary. A pc board cleaner is a solvent designed to remove contaminants, flux, and residues from printed circuit boards without damaging the components or leaving a residue itself.
Using a pc board cleaner is an advanced procedure. It often involves disconnecting components and carefully applying the solvent with a brush, then ensuring it evaporates completely. For the vast majority of users, any situation that might require a pc board cleaner is a situation that requires a visit to a professional computer service and repair shop. They have the expertise and tools, like ultrasonic cleaners, to safely and effectively perform this delicate operation. Attempting it yourself without experience can easily lead to a short circuit and a dead laptop.
Beyond Hardware: The Digital PC Cleaner
A truly comprehensive laptop cleaning regimen includes tidying up the digital clutter inside your machine. A slow computer isn’t always due to physical dust; digital “dust” in the form of temporary files, unwanted bloatware, and invasive malware
can also bog down performance. Acting as a digital pc cleaner can yield significant speed improvements.
Digital Cleaning Tasks
- Run Disk Cleanup: Both Windows (Disk Cleanup) and macOS (Storage Management) have built-in utilities that act as a basic pc cleaner. These tools can scan your drive and safely remove temporary internet files, system error reports, old update files, and other digital junk that accumulates over time.
- Uninstall Unused Software: Go through your list of installed applications. If you find programs you haven’t used in months (or ever), uninstall them. They consume valuable disk space and may have background processes that use up RAM and CPU cycles.
- Manage Startup Programs: Many applications set themselves to launch automatically when you turn on your computer. This can dramatically increase boot times and consume resources. Use the Task Manager (on Windows) or System Settings (on macOS) to disable unnecessary startup programs.
- Scan for Malware: Malicious software running in the background is a notorious cause of system slowdowns. Run a full system scan with a reputable antivirus and anti-malware program. This is the most important form of digital computer cleaning for security and performance.
- Defragment Your Hard Drive (HDD Only): If your laptop has a traditional Hard Disk Drive (HDD), defragmenting it can improve file access times. Note: Never defragment a Solid-State Drive (SSD). It is unnecessary and can reduce the drive’s lifespan.
When to Call the Experts: Professional Computer Servicing
DIY laptop cleaning is fantastic for regular maintenance, but there are times when a professional’s touch is required. A professional computer servicing goes beyond a simple dust-out and can address deeper issues.
Signs You Need Professional Computer Service and Repair:
- Persistent Overheating: If your laptop still runs hot and loud after a thorough external and internal cleaning, the issue might be old, dried-out thermal paste between the CPU and heatsink. Replacing this requires a full disassembly and is best left to a professional.
- Strange Noises: Clicking, grinding, or whining sounds that you can’t attribute to the fan may indicate a failing hard drive or other mechanical component.
- System Instability: Frequent crashes, blue screens, or random reboots after you’ve performed digital cleaning could signal a hardware problem that requires professional diagnostics.
- Liquid Spills: If you spill anything on your laptop, turn it off immediately, unplug it, and take it to a computer service and repair shop. They can perform a deep clean using a pc board cleaner and other tools to mitigate corrosion and long-term damage.
- You’re Not Comfortable Opening It: There’s no shame in it. If the thought of taking a screwdriver to your laptop fills you with dread, a professional computer servicing is a wise investment for your peace of mind.
A professional service can perform a complete teardown, clean every component individually, reapply high-quality thermal paste, and diagnose any underlying hardware issues you might have missed. This is the ultimate form of laptop cleaning.
Creating a Consistent Laptop Cleaning Routine
Consistency is the key to reaping the benefits of computer cleaning. A little bit of maintenance done regularly is far more effective than a massive cleaning session once a year.
- Weekly (5 minutes):
- Wipe the screen with a dry microfiber cloth.
- Wipe the keyboard and chassis with a cloth dampened with isopropyl alcohol.
- Perform a quick visual check of the vents for major blockages.
- Monthly (15 minutes):
- Perform the full external laptop cleaning routine.
- Use compressed air on the keyboard and vents.
- Run your digital pc cleaner tools (Disk Cleanup, malware scan).
- Annually or Bi-Annually (1-2 hours or a professional visit):
- Perform the internal laptop cleaning to dust out the fans and heatsink.
- Alternatively, take it in for a professional computer servicing to have this done along with a check-up and thermal paste reapplication.
Common Mistakes to Avoid During Laptop Cleaning
While laptop cleaning is beneficial, doing it wrong can be disastrous. Here are some of the most common pitfalls to avoid.
- Using the Wrong Liquids: Never use Windex, ammonia-based cleaners, bleach, or any general household surface cleaner on any part of your laptop. They will damage the screen coating and can discolor or weaken the plastic chassis. Stick to isopropyl alcohol for the body and a dedicated laptop screen cleaner for the display.
- Spraying Directly onto the Laptop: This is a cardinal sin of computer cleaning. Liquid can easily seep through keyboard crevices or screen bezels and short-circuit the sensitive electronics inside. Always apply your cleaning solution to your cloth first.
- Using Abrasive Materials: Paper towels, tissues, and rough cloths can leave lint behind and cause micro-scratches on your screen and glossy plastic surfaces. Always use a high-quality microfiber cloth.
- Forgetting to Power Down: Cleaning a running laptop is a recipe for disaster. You could accidentally press a key combination that deletes files, or worse, cause a short circuit if any moisture is involved. Always unplug it and power it down completely.
One of the most frequently misunderstood and damaging mistakes involves the use of compressed air on internal fans. Many people, in their eagerness to perform a thorough internal computer cleaning, will simply open the case and blast the fan with a powerful stream of air without a second thought.
This action, while well-intentioned, can be catastrophic for the fan’s bearing. Laptop fans are small, delicate components designed to spin within a specific RPM (revolutions per minute) range. When you hit the blades with a jet of compressed air, you can force the fan to spin exponentially higher than its design limits.
This is called overspeeding, and it can instantly destroy the fluid dynamic or ball bearing inside the fan assembly. The result is a fan that will either seize up completely or develop an incredibly annoying and persistent rattling, whining, or grinding noise.
The irony is that in an attempt to solve an overheating problem through laptop cleaning, you’ve created a new, and often more expensive, problem that requires a full fan replacement—a complex task that necessitates a deeper level of computer service and repair.
Always remember to gently hold the fan blades stationary with a finger or a non-conductive tool before you apply compressed air. This ensures you are cleaning the component without simultaneously destroying it.
- Neglecting the Vents: Wiping down the keyboard and making the screen sparkle is great, but if you ignore the air vents, you’re missing the most critical part of performance-related computer cleaning. A clean laptop with clogged vents will still overheat.
- Applying Too Much Pressure: Whether you’re wiping the screen or cleaning the keyboard, be gentle. Excessive force can damage screen pixels, break keyboard switches, or scratch surfaces.
The Tangible Impact of a Clean Computer
The benefits of a diligent laptop cleaning routine are not just theoretical; they are tangible and measurable. A clean computer runs cooler. A cooler computer does not need to thermally throttle its processor. This means your applications launch faster, videos render more smoothly, games maintain higher frame rates, and your entire user experience feels more responsive.
By preventing the extreme heat buildup that stresses components, regular computer cleaning directly contributes to a longer lifespan for your device. You can delay the need for an expensive upgrade by years, simply by keeping your current machine in peak physical condition. The small investment in a laptop screen cleaner and a can of compressed air pays for itself many times over by preventing costly computer service and repair bills and extending the life of your valuable hardware. Embracing laptop cleaning is embracing a philosophy of proactive care that ensures your technology serves you well for years to come.
Conclusion: Make Laptop Cleaning a Priority
Laptop cleaning should be viewed as an essential, non-negotiable part of your digital life. It is the single most effective action you can take to maintain your computer’s performance, ensure its stability, and maximize its lifespan. From the simple weekly wipe-down to the more involved annual internal dust-out, each step contributes to a healthier, more efficient machine.
Don’t wait until your laptop is running hot enough to cook on or so slow that it becomes unusable. By creating a simple routine using the right tools and techniques—a proper laptop screen cleaner, microfiber cloths, and compressed air—you can prevent problems before they start. And when you encounter an issue beyond your comfort zone, don’t hesitate to seek professional computer servicing. Treat your laptop well, and it will repay you with years of reliable performance. Start your laptop cleaning routine today.
Related Post: The Ultimate Laptop Buying Guide: 12 Steps to Your Perfect PC in 2025